

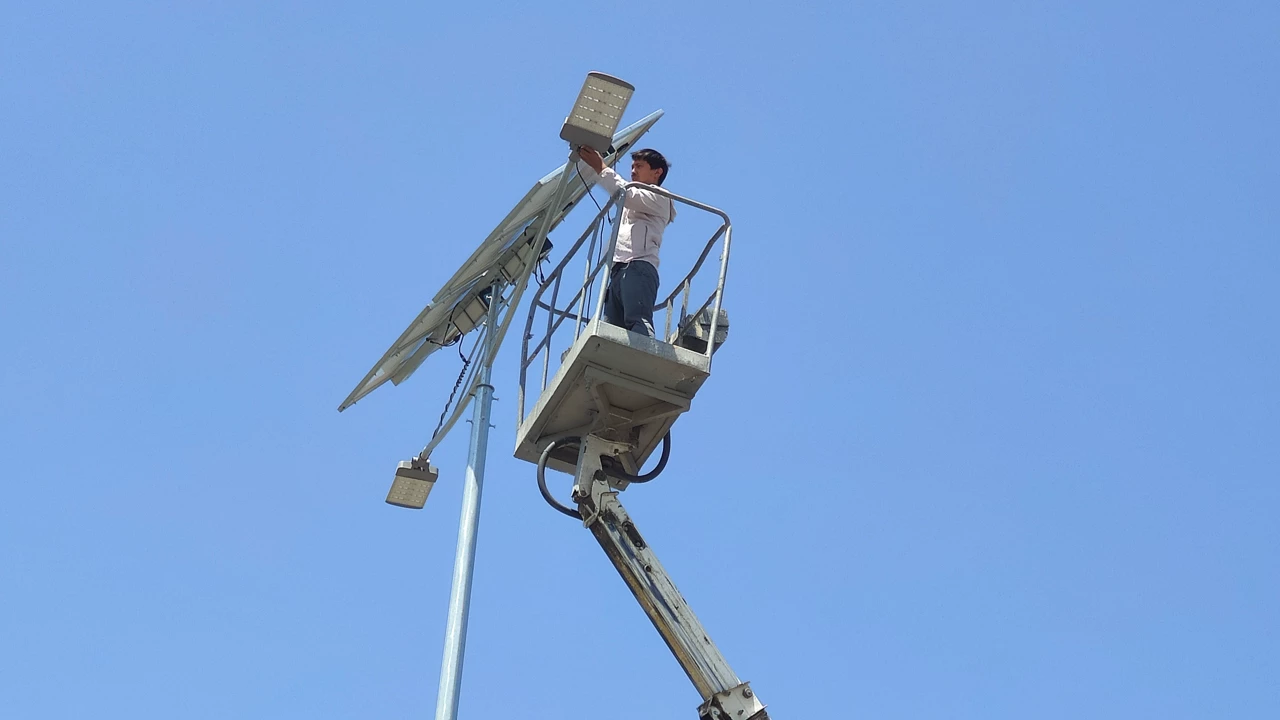
Most solar street light problems that show up in the first year trace back to something that happened during installation, not a defect in the equipment itself—a foundation poured without checking cable routing, a panel angled for someone else's roof pitch instead of the site's actual latitude, or a battery connected before the system was tested end to end. This guide walks through the installation process as it actually happens on site, organized by phase rather than a generic checklist: what to confirm before the truck even arrives; how the foundation and pole go in; how the solar and electrical components get connected and commissioned; and what to verify before calling the job done—written for installation crews, EPC site supervisors, and project managers who want to know what "correct" actually looks like at each stage, not just a list of parts.

Getting Solar Street Light Installation Right the First Time
Ask any experienced installation crew what causes the most callbacks in the first year of a solar street lighting project, and the answer is rarely a faulty panel or a defective battery. It's almost always something that happened during installation itself—a foundation depth that didn't account for local soil conditions, a panel tilt angle copied from a different project's latitude, a connection made before the system was actually tested, or a pole erected before anyone confirmed the cable routing would work.
This guide walks through installation the way it actually unfolds on site, in four phases: what needs confirming before work begins, how the foundation and pole go in, how the electrical and solar components get connected and commissioned, and what a proper handover looks like before the crew moves to the next pole.
Phase One: Before the Truck Arrives
A surprising amount of on-site rework traces back to decisions that should have been made — and confirmed — before installation day.
Confirm the specification matches the site, not just the tender. Wattage, pole height, and spacing should have been set by a photometric layout for the actual road geometry—but it's worth a final site check that nothing changed since that layout was produced. A road widened, a median added, or nearby trees grown taller since the design phase can all shift what the original calculation assumed.
Check soil conditions at each pole location, not just one representative sample. Foundation depth and reinforcement requirements can vary meaningfully across a single project site—sandy coastal soil, compacted urban fill, and rocky terrain each demand different foundation approaches, and a single generic foundation spec applied uniformly across a mixed-soil site is a common source of later pole instability.
Verify cable routing and underground utilities before any digging begins. For split-design systems in particular, where cabling runs from the panel down to a ground-level or underground battery enclosure, confirming there's no conflict with existing utility lines avoids a costly mid-installation surprise.
Stage components by pole, not by type. Delivering all panels to one pile, all batteries to another, and all poles to a third sounds efficient but frequently causes mismatched serial numbers or missing components discovered only once a crew reaches a specific pole—organizing delivery by pole location catches this earlier.

Phase Two: Foundation and Pole Installation
With site conditions confirmed, the physical installation begins.
Foundation depth and reinforcement should follow the pole height and expected wind load, not a fixed default. Taller poles (8-12m, typically used for highway and arterial road lighting) carry significantly more wind load than a 3-4m footpath pole, and the foundation needs to be sized accordingly — an undersized foundation on a tall pole is one of the more serious safety issues an installation can introduce.
Anchor bolt alignment matters more than it seems. Poles are typically secured to the foundation via anchor bolts embedded during the concrete pour, and even small misalignments can create ongoing stress on the pole base once erected. Templates supplied by the pole manufacturer, checked before the concrete sets, prevent this.
Curing time before the pole goes up isn't optional, even under deadline pressure. Erecting a pole on a foundation that hasn't reached adequate strength risks settling or tilting that's expensive to correct after the fact—this is one of the more common corners cut on fast-turnaround government projects, and one of the more consequential ones.
Working at height during pole and fixture installation carries genuine safety risks that shouldn't be treated casually regardless of project timeline pressure. The International Labour Organization's guidance on working at height outlines a hierarchy of controls—avoiding height work where possible, then preventing falls through proper equipment, before relying on personal protective measures alone—that applies directly to pole-top installation and maintenance work.

Phase Three: Solar, Electrical, and Battery Connection
This is where a project's long-term performance is largely determined.
Panel orientation and tilt angle should be set for the site's actual latitude, not copied from a template used elsewhere. Panels tilted for a different latitude than the installation site lose meaningful charging efficiency over the system's life — a mistake that's invisible at handover but shows up as underperformance during the next cloudy season.
All-in-one and split systems have different connection sequences. For All-in-One units, the integrated panel, battery, and controller are typically pre-wired at the factory, reducing on-site connection points to the pole mounting and any ground-level power distribution wiring. For split systems, the on-site crew connects the panel, battery enclosure, and light head separately—see our all-in-one vs. split comparison if you're unsure which connection sequence applies to your project.
Battery connection should be one of the last steps, not an early one. Connecting the battery before confirming the panel, controller, and LED are all correctly wired risks unnecessary battery drain or, in the worst cases, damage from an incorrect connection sequence. A final continuity and polarity check before battery connection catches most wiring errors before they matter.
Grounding and surge protection aren't optional extras, particularly in regions with frequent lightning activity. Proper grounding protects both the electrical components and anyone who might contact the pole during a fault condition.
Phase Four: Commissioning and Handover
Installation isn't complete when the light turns on—it's complete when the system has been verified to actually perform as specified.
Run the system through a full day-night cycle before considering the poll done. This confirms the light actually triggers at dusk, holds through the night at the correct dimming or full-output schedule if applicable, and shuts off correctly at dawn—catching sensor or controller misconfigurations that a quick visual check during daytime installation would miss entirely.
Verify battery charge behavior over at least one full cycle, not just that the light turns on. A battery that lights the fixture on its first night using residual factory charge can still be improperly connected to the charging circuit—only a full charge-discharge cycle confirms the system is actually self-sustaining.
Photograph and document each installed pole — GPS location, serial numbers, and a photo of the completed installation — before moving to the next site. This documentation becomes essential for warranty claims, maintenance scheduling, and government project sign-off, and it's far easier to capture during installation than to reconstruct later.
Walk through basic operation with whoever will maintain the system, even if that's a different team or agency than the installation crew. A simple handover — what normal operation looks like, who to contact for issues, and where documentation is stored — prevents avoidable service calls in the first few months.
When Something Doesn't Work on First Power-Up
A few issues account for most first-power-up problems, and knowing where to look saves time:
| Symptom | Most Likely Cause | Where to Check First |
|---|---|---|
| Light doesn't turn on at dusk | Light sensor miswired or obstructed, or controller misconfigured | Sensor wiring and physical placement |
| The light turns on but dims quickly | Battery not fully charged before first use, or panel angle wrong for site latitude | Panel tilt angle and initial charge state |
| Light flickers or cycles on/off | Loose connection, often at the battery terminal or controller input | All connection points, starting with the most recently made |
| The battery drains faster than expected | Panel shading from nearby structures or vegetation not visible during site survey | Physical obstructions at different times of day |
| The pole shows movement or slight tilt | Insufficient curing time before erection, or foundation undersized for wind load | Foundation depth and curing records for that specific pole |
For issues beyond this basic troubleshooting, see our performance FAQ for more detailed diagnostics.
Frequently Asked Questions
How long does it take to install one solar street light pole?
Timing varies by design—all-in One system is generally faster since components arrive pre-wired, while split systems take longer due to separate panel, battery, and light head connections. Foundation curing time, not the physical installation itself, is often the longest part of the overall timeline per pole.
Do solar street lights need a specific foundation depth?
Foundation depth depends on pole height, expected wind load, and local soil conditions—there's no single universal depth. A foundation designed for a 4m residential pole in stable soil is not adequate for a 10m highway pole in sandy coastal soil.
Can solar street lights be installed without specialized equipment?
Shorter poles can often be installed with basic equipment, but taller poles (8 m and above) typically require a crane or similar lifting equipment for safe erection, and pole-head maintenance on any height typically requires a bucket truck or lift unless the system uses a split design with ground-level battery access.
What's the most common mistake in solar street light installation?
Panel tilt angle set incorrectly for the site's actual latitude is one of the most common and most invisible mistakes—it doesn't prevent the light from working initially, but it reduces charging efficiency over the system's life in a way that's easy to miss until performance degrades.
How do you verify a solar street light is working correctly after installation?
Run the system through at least one full day-night cycle and one full battery charge-discharge cycle before considering installation complete, rather than relying on the light simply turning on using the initial factory charge.
Final Thought
A solar street light that performs reliably for a decade and one that generates service calls within the first rainy season are often built with the same components—the difference is almost always in what happened during installation, not what was specified on paper. Confirming site conditions before digging, respecting curing time under deadline pressure, and running a full commissioning cycle before calling a pole complete are the habits that separate the two outcomes.
Need installation support or training for your project team?
Contact our engineering team for guidance, or see our installation FAQ for additional common questions.
More from

Solar Street Light Installation Guide: Step-by-Step
Most solar street light problems that show up in the first year trace back to something that happened during installation, not a defect in the equipment itself—a foundation poured without checking cable routing, a panel angled for someone else's roof pitch instead of the site's actual latitude, or a battery connected before the system was tested end to end. This guide walks through the installation process as it actually happens on site, organized by phase rather than a generic checklist: what to confirm before the truck even arrives; how the foundation and pole go in; how the solar and electrical components get connected and commissioned; and what to verify before calling the job done—written for installation crews, EPC site supervisors, and project managers who want to know what "correct" actually looks like at each stage, not just a list of parts.

How to Choose the Right Solar Street Light System
Choosing the right solar street light system is essential for achieving reliable outdoor lighting performance, long battery lifespan, and stable nighttime illumination.
Whether the project is for municipal roads, highways, industrial parks, villages, commercial spaces, or public infrastructure, selecting the proper solar street lighting configuration directly affects energy efficiency, installation costs, maintenance requirements, and long-term operational stability.
This guide explains the key factors that should be considered when choosing a solar street lighting system for different outdoor applications and environmental conditions.

Solar Street Light Cost Analysis and ROI Guide
For many years, solar street lighting was often viewed as a niche solution mainly used in remote villages or small off-grid applications.
That perception has changed rapidly.
Today, solar street lighting systems are being deployed across municipal roads, highways, industrial parks, residential communities, mining areas, and large-scale infrastructure projects worldwide.
The reason is no longer only environmental sustainability.
It is economics.
As electricity prices continue rising and infrastructure construction becomes more expensive, governments, contractors, and developers are paying closer attention to long-term operational costs instead of simply comparing upfront equipment pricing.
And this is where solar street lighting starts becoming financially attractive.
At first glance, many buyers still assume solar street lights are expensive.
After all, a complete system includes:
- • solar panels
- • lithium batteries
- • LED fixtures
- • intelligent controllers
- • structural mounting systems
Compared to a conventional street lamp fixture alone, the initial quotation may appear significantly higher.
But experienced infrastructure planners rarely evaluate a project based only on fixture cost.
Because in real-world roadway projects, the lighting fixture is often only a small part of the total investment.

MPPT vs PWM Controllers for Solar Street Lighting Systems
The solar charge controller is one of the most critical components in a solar street lighting system. It directly affects charging efficiency, battery lifespan, and system reliability.
Two commonly used technologies are MPPT (Maximum Power Point Tracking) and PWM (Pulse Width Modulation) controllers.
This article explains their differences and helps you choose the right solution for solar street lighting projects.
How to Choose the Right Solar Street Light System
Choosing the right solar street light system is essential for achieving reliable outdoor lighting performance, long battery lifespan, and stable nighttime illumination.
Whether the project is for municipal roads, highways, industrial parks, villages, commercial spaces, or public infrastructure, selecting the proper solar street lighting configuration directly affects energy efficiency, installation costs, maintenance requirements, and long-term operational stability.
This guide explains the key factors that should be considered when choosing a solar street lighting system for different outdoor applications and environmental conditions.
Solar Street Light Cost Analysis and ROI Guide
For many years, solar street lighting was often viewed as a niche solution mainly used in remote villages or small off-grid applications.
That perception has changed rapidly.
Today, solar street lighting systems are being deployed across municipal roads, highways, industrial parks, residential communities, mining areas, and large-scale infrastructure projects worldwide.
The reason is no longer only environmental sustainability.
It is economics.
As electricity prices continue rising and infrastructure construction becomes more expensive, governments, contractors, and developers are paying closer attention to long-term operational costs instead of simply comparing upfront equipment pricing.
And this is where solar street lighting starts becoming financially attractive.
At first glance, many buyers still assume solar street lights are expensive.
After all, a complete system includes:
- • solar panels
- • lithium batteries
- • LED fixtures
- • intelligent controllers
- • structural mounting systems
Compared to a conventional street lamp fixture alone, the initial quotation may appear significantly higher.
But experienced infrastructure planners rarely evaluate a project based only on fixture cost.
Because in real-world roadway projects, the lighting fixture is often only a small part of the total investment.
MPPT vs PWM Controllers for Solar Street Lighting Systems
The solar charge controller is one of the most critical components in a solar street lighting system. It directly affects charging efficiency, battery lifespan, and system reliability.
Two commonly used technologies are MPPT (Maximum Power Point Tracking) and PWM (Pulse Width Modulation) controllers.
This article explains their differences and helps you choose the right solution for solar street lighting projects.

Solar Street Light vs Grid Street Light: Which Costs Less Over 10 Years?
An upfront price only tells half the story. Here's the full cost breakdown — installation, electricity bills, maintenance, and reliability — so you can see which option actually costs less over your project's lifetime.

Solar Street Light Installation Guide for Roads and Infrastructure Projects
Installing solar street lights is often described as a straightforward process.
On paper, it looks simple: assemble the pole, fix the solar panel, connect the battery, and test the system.
But in real infrastructure projects, installation is rarely that clean.
Once engineers arrive on site, they are usually dealing with uneven road conditions, unexpected shading issues, unstable soil for foundations, transportation limitations, and last-minute design adjustments based on actual field conditions.
This is why installation quality often determines the real lifespan and performance of a solar street lighting system more than product specifications alone.
A well-designed system can still perform poorly if installation is not handled correctly. On the other hand, a properly installed system can often outperform expectations even in challenging environments.

Best Solar Street Lights for Nigeria: Buying Guide 2026
Nigeria's road network spans everything from dense Lagos arterial roads to unlit rural highways with no nearby grid connection, and each of these contexts calls for a different solar street light specification. This guide covers what government agencies, EPC contractors, and distributors sourcing for Nigerian projects need to know: which wattage and pole height suit Nigeria's road classifications; how to size battery autonomy for Nigeria's rainy season; why grid reliability makes solar an increasingly practical choice outside major cities; what corrosion protection matters in coastal states like Lagos and Rivers; and what to look for in a supplier with genuine Nigerian project experience—so you can specify a system that performs reliably across Nigeria's diverse climate and infrastructure conditions.
Want to get more information?
We provide professional solar street light specification sheets, technical guides, project case books, installation manuals, and bidding documents. Leave a message to get exclusive industry resources and technical support for your bulk procurement and engineering projects.
The messenger of light & power conversion.
© 2026 Queneng Light
 Jason Qiu
Queneng
Queneng
Queneng
Queneng